
Professional stage lighting transforms live performances, theatrical productions, concerts, worship services, conferences, television broadcasts, and corporate events. However, achieving outstanding lighting results requires more than purchasing high-quality fixtures. A successful installation depends on careful planning, safe rigging, reliable electrical distribution, proper fixture placement, and thorough testing.
Whether you’re installing a permanent lighting system in a theatre or church, setting up a television studio, or preparing a temporary rig for a concert or festival, following a structured installation process ensures your lighting system is safe, efficient, and ready to perform.
This step-by-step guide walks you through the complete process of installing professional stage lighting.
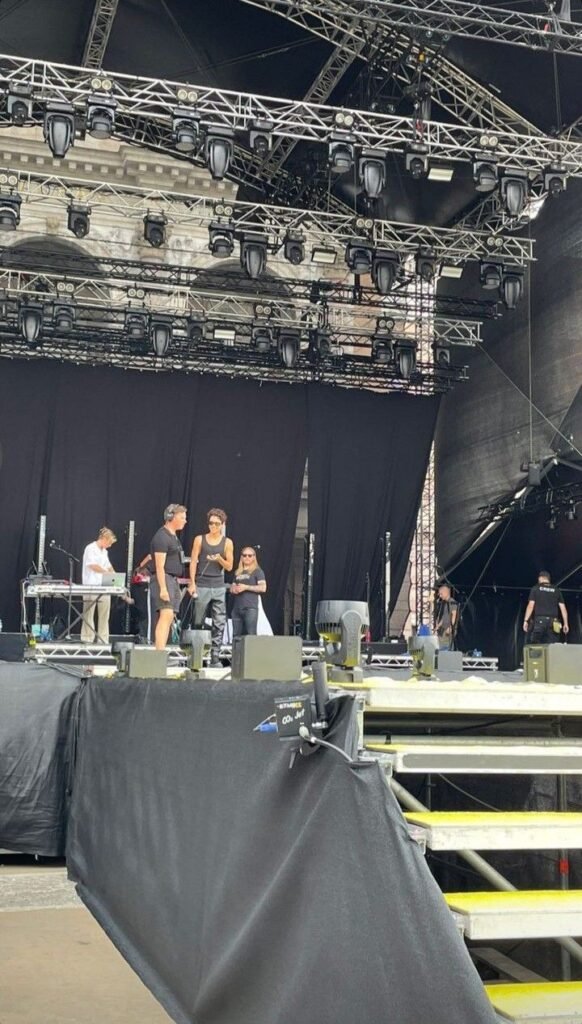
Step 1: Assess the Venue
Before selecting any equipment, evaluate the venue and its technical requirements.
Consider:
- Stage dimensions
- Ceiling or truss height
- Audience seating layout
- Rigging points
- Structural load capacity
- Existing electrical infrastructure
- Maintenance access
- Indoor or outdoor environment
A thorough site assessment helps determine the best lighting layout and equipment selection.
Step 2: Define Your Lighting Goals
Different venues require different lighting solutions.
Identify how the space will be used, such as:
- Concerts
- Theatre productions
- Church services
- Television broadcasts
- Conferences
- Exhibitions
- School performances
- Multi-purpose events
Your lighting objectives will influence fixture types, beam angles, brightness, and control systems.
Step 3: Create a Lighting Design
Develop a detailed lighting plan before installation begins.
Your design should include:
- Fixture locations
- Lighting positions
- Beam coverage
- Throw distances
- Control zones
- DMX universes
- Electrical circuits
- Rigging locations
A lighting plot helps installers position fixtures accurately while avoiding dark spots or excessive overlap.
Step 4: Select the Right Lighting Fixtures
Choose fixtures based on the venue and production requirements.
Common professional fixtures include:
- Moving head spot lights
- Moving head wash lights
- Beam lights
- LED PAR lights
- Fresnel fixtures
- Profile spotlights
- Followspots
- LED battens
- Audience blinders
Ensure all fixtures are suitable for the installation environment, especially for outdoor applications.
Step 5: Inspect the Rigging Structure
Before mounting any equipment, inspect the supporting structure.
Check:
- Trusses
- Lighting bars
- Ceiling grids
- Hoists
- Mounting pipes
- Suspension points
Verify that all structures are capable of supporting the intended loads.
Step 6: Mount the Lighting Fixtures
Install fixtures using certified entertainment rigging hardware.
Best practices include:
- Use approved clamps or couplers.
- Tighten all mounting hardware securely.
- Attach an independent safety cable to every overhead fixture.
- Confirm fixtures are properly aligned.
- Leave enough clearance for moving head pan and tilt movement.
Never exceed the Working Load Limit (WLL) of the truss or mounting hardware.
Step 7: Install Power Distribution
Plan electrical distribution carefully.
Tasks include:
- Calculate total power requirements.
- Balance loads across circuits.
- Install power distribution units (PDUs).
- Verify grounding.
- Label every circuit.
- Leave spare electrical capacity for future expansion.
A properly designed electrical system improves reliability and protects expensive equipment.
Step 8: Route Power and Data Cables
Run cables neatly and safely.
Power cable guidelines:
- Keep runs organized.
- Protect walkways with cable ramps.
- Avoid excessive cable tension.
- Secure cables to trusses where appropriate.
Data cable guidelines:
- Install DMX512 or network cables.
- Label both ends of every cable.
- Keep signal cables separate from high-voltage power cables where possible.
- Allow enough slack for moving fixtures.
Good cable management simplifies troubleshooting and maintenance.
Step 9: Configure the Control System
Set up the lighting control network.
Configuration tasks include:
- Assign DMX addresses.
- Configure fixture personalities.
- Set DMX universes.
- Configure Art-Net or sACN if using networked lighting.
- Connect the lighting console.
- Save backup show files.
Accurate configuration ensures reliable communication between the console and fixtures.
Step 10: Focus and Aim the Fixtures
Once installed, adjust each fixture to achieve the desired lighting coverage.
Check:
- Beam alignment
- Focus
- Zoom
- Color mixing
- Position presets
- Front light angles
- Backlight coverage
- Side lighting balance
Proper focusing improves visibility and enhances the overall production.
Step 11: Test Every Fixture
Before opening the venue or beginning rehearsals, perform a complete system test.
Verify:
- Power distribution
- Fixture response
- DMX communication
- Pan and tilt movement
- Dimming
- Color mixing
- Gobos
- Zoom
- Focus
- Strobe effects
- Network communication
Correct any issues before the first performance.
Step 12: Perform a Final Safety Inspection
Complete a comprehensive inspection of the installation.
Confirm:
- Clamps are secure.
- Safety cables are attached.
- Trusses are undamaged.
- Electrical connections are safe.
- Cables are properly managed.
- Fixtures have adequate ventilation.
- Emergency access remains clear.
Document the inspection before the venue is placed into service.
Step 13: Create Documentation
Prepare detailed records for future maintenance.
Include:
- Lighting plot
- Fixture inventory
- DMX address list
- Circuit assignments
- Network diagrams
- Power calculations
- Warranty information
- Maintenance schedule
- Firmware versions
Well-maintained documentation simplifies future upgrades and troubleshooting.
Step 14: Train Venue Staff
Ensure operators understand the lighting system.
Training should cover:
- Console operation
- Power-up procedures
- Shutdown procedures
- Routine cleaning
- Preventive maintenance
- Basic troubleshooting
- Emergency procedures
Well-trained staff help protect the investment and reduce downtime.

Common Installation Mistakes to Avoid
Avoid these common errors:
- Skipping the lighting design phase
- Overloading electrical circuits
- Ignoring truss load limits
- Failing to install safety cables
- Poor cable management
- Incorrect DMX addressing
- Blocking fixture ventilation
- Inadequate testing before events
- Forgetting future expansion requirements
Careful planning prevents expensive corrections later.
Professional Installation Checklist
Before completing the project, verify that:
- Venue assessment completed
- Lighting design approved
- Fixtures installed correctly
- Trusses inspected
- Safety cables attached
- Electrical distribution tested
- Power calculations verified
- DMX addressing completed
- Cable management finished
- Fixtures focused
- Full system tested
- Documentation completed
- Staff trained
Frequently Asked Questions
How long does it take to install a professional stage lighting system?
Installation time depends on the size and complexity of the venue. Small venues may take one to three days, while large theatres, concert halls, or broadcast studios may require several weeks, including design, rigging, programming, and testing.
Can I install professional stage lighting myself?
Small installations may be manageable for experienced technicians, but larger or permanent systems should be installed by qualified professionals familiar with electrical systems, entertainment rigging, and applicable safety regulations.
Why is a lighting design important before installation?
A lighting design ensures proper fixture placement, balanced stage coverage, efficient power distribution, and room for future expansion while reducing installation errors.
Should every fixture have a safety cable?
Yes. Every overhead lighting fixture should have an independent, load-rated safety cable in addition to its primary mounting hardware.
When should the lighting system be tested?
The entire system should be tested immediately after installation and again before every event to verify power, control, fixture operation, and safety.
Conclusion
Installing professional stage lighting is a detailed process that combines lighting design, structural rigging, electrical planning, cable management, fixture configuration, and comprehensive testing. By following a structured step-by-step approach, venues can build lighting systems that are safe, reliable, scalable, and capable of delivering exceptional performances.
Whether you’re equipping a theatre, church, television studio, concert venue, conference center, school auditorium, or outdoor event space, investing in proper installation practices ensures years of dependable operation and professional-quality lighting.