
Installing a professional stage lighting system in a new venue is a major investment that directly impacts performance quality, operational efficiency, and long-term maintenance costs. Whether you’re outfitting a theatre, church, concert hall, television studio, conference center, school auditorium, or multipurpose event space, careful planning and a structured installation process are essential.
A comprehensive installation checklist helps ensure that every aspect of the lighting system—from power distribution and rigging to programming and testing—is completed correctly before the venue opens.
This guide provides a complete stage lighting installation checklist to help venue owners, contractors, lighting designers, and installers create a safe, reliable, and future-ready lighting system.
Why Use an Installation Checklist?
A structured checklist helps you:
- Reduce installation errors
- Improve safety
- Ensure consistent lighting performance
- Simplify future maintenance
- Prevent costly rework
- Meet electrical and safety regulations
- Prepare for future expansion
- Deliver a professional lighting system from day one
Using a checklist also improves communication between designers, electricians, installers, and venue managers.
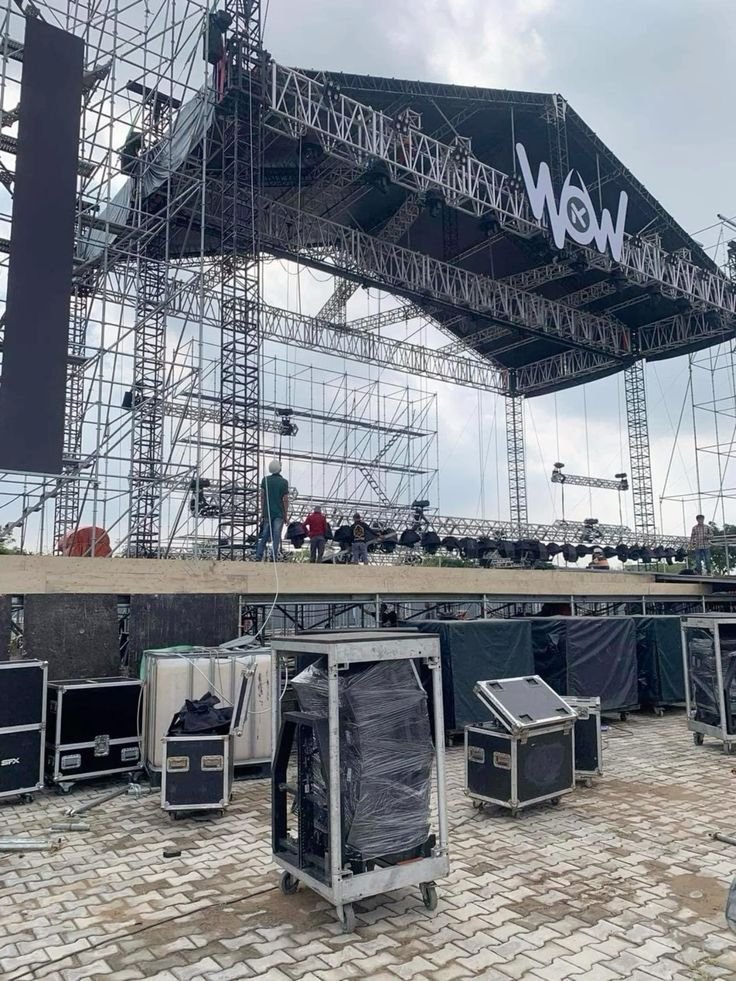
Phase 1: Venue Assessment
Before purchasing any equipment, evaluate the venue.
Confirm Venue Details
- Stage dimensions
- Ceiling or roof height
- Audience seating layout
- Rigging locations
- Structural load capacity
- Power availability
- Existing infrastructure
- Access for maintenance
Understanding the venue helps determine the appropriate lighting system design.
Phase 2: Lighting Design
Develop a lighting plan based on the venue’s intended use.
Define Lighting Objectives
- Concerts
- Theatre productions
- Church services
- Conferences
- Broadcast production
- School performances
- Corporate events
- Multi-purpose use
Select Fixture Types
- Moving head lights
- LED PAR lights
- Wash lights
- Beam lights
- Profile spotlights
- Fresnel fixtures
- Followspots
- LED battens
- Audience blinders
- House lights
Ensure the fixture selection matches the venue’s performance requirements.
Phase 3: Rigging and Infrastructure
Verify that all mounting structures are suitable for overhead lighting.
Inspect Rigging Systems
- Trusses
- Ceiling grids
- Lighting bars
- Pipes
- Hoists
- Mounting points
Install Certified Hardware
- Half couplers
- Omega brackets
- Safety cables
- Load-rated bolts
- Truss clamps
Confirm that every component is rated for the intended load.
Phase 4: Electrical Planning
A reliable electrical system is essential for safe operation.
Verify Power Requirements
- Calculate total connected load
- Balance circuits
- Plan spare capacity
- Confirm voltage
- Verify grounding
- Select power distribution units
- Label circuits
Electrical work should comply with local regulations and applicable electrical codes.
Phase 5: Cable Installation
Install power and data cables using professional cable management practices.
Power Cables
- Correct cable size
- Secure routing
- Protected walkways
- Weather protection (if applicable)
- Cable identification
Data Cables
- DMX512
- Ethernet (Art-Net or sACN)
- Network switches
- Wireless DMX (if used)
Clearly label every cable at both ends.
Phase 6: Fixture Installation
Mount lighting fixtures safely.
Verify:
- Correct fixture locations
- Proper mounting height
- Secure clamps
- Safety cables attached
- Fixture orientation
- Cooling clearance
- Pan and tilt clearance
Never overload trusses or mounting structures.
Phase 7: Control System Setup
Configure the lighting control system.
Setup Includes
- DMX addressing
- Fixture personalities
- Universe assignments
- Network configuration
- Console setup
- Backup show files
Maintain a record of all configuration settings.
Phase 8: Programming
Create a functional lighting show file.
Program:
- Fixture groups
- Color palettes
- Position presets
- Beam effects
- Gobos
- Zoom settings
- Cue lists
- Playback pages
Well-organized programming makes future productions more efficient.
Phase 9: System Testing
Before opening the venue, test every part of the system.
Functional Tests
- Power distribution
- Circuit loading
- Fixture response
- DMX communication
- Network communication
- Pan and tilt
- Dimming
- Color mixing
- Zoom
- Focus
- Gobo rotation
- Strobe effects
Resolve all issues before commissioning the system.
Phase 10: Safety Inspection
Perform a final safety inspection.
Verify:
- Safety cables
- Clamp security
- Truss condition
- Load calculations
- Electrical grounding
- Emergency shutdown procedures
- Fire exits remain unobstructed
- Cable routing
Safety inspections should be documented and approved before public use.
Phase 11: Documentation
Prepare complete documentation for the venue.
Include:
- Fixture inventory
- Serial numbers
- Lighting plot
- DMX address list
- Circuit schedules
- Network diagrams
- Maintenance schedule
- Warranty information
- Operating manuals
- Spare parts list
Good documentation simplifies maintenance and future upgrades.
Phase 12: Staff Training
Ensure venue staff understand the lighting system.
Training should include:
- Console operation
- Power-up and shutdown procedures
- Routine inspections
- Cleaning procedures
- Basic troubleshooting
- Emergency procedures
- Maintenance reporting
Proper training helps protect equipment and improve operational efficiency.
Final Installation Checklist
Before opening the venue, confirm that the following have been completed:
Venue
- Stage measured
- Structural assessment completed
- Maintenance access confirmed
Lighting
- Fixtures installed
- Fixtures focused
- Beam coverage verified
Rigging
- Certified clamps installed
- Safety cables attached
- Load limits verified
Electrical
- Power calculations completed
- Circuits balanced
- Grounding verified
- Distribution tested
Control
- DMX addresses assigned
- Network configured
- Console programmed
- Backup files created
Safety
- Full inspection completed
- Emergency procedures verified
- Documentation completed
- Staff trained
Frequently Asked Questions
Why is an installation checklist important?
An installation checklist ensures that every part of the lighting system is properly planned, installed, tested, and documented. It reduces errors, improves safety, and helps deliver a reliable lighting system.
What should be installed first?
The venue assessment and lighting design should always be completed before purchasing equipment or beginning installation. Proper planning prevents costly modifications later.
Should future expansion be included in the design?
Yes. Allowing spare electrical capacity, additional DMX universes, and extra rigging positions makes future upgrades much easier and more cost-effective.
Why is documentation necessary?
Accurate documentation simplifies maintenance, troubleshooting, staff training, warranty claims, and future system expansion.
How often should a newly installed system be inspected?
A full inspection should be completed before the venue opens, followed by routine inspections before events and scheduled preventive maintenance throughout the life of the system.
Conclusion
Installing a stage lighting system in a new venue requires careful coordination between lighting designers, installers, electricians, and venue managers. By following a comprehensive installation checklist—from initial planning and power calculations to rigging, programming, testing, and staff training—you can create a lighting system that is safe, reliable, scalable, and ready to support a wide range of productions.
Whether you’re opening a theatre, church, concert venue, television studio, conference center, school auditorium, or multipurpose performance space, a structured installation process ensures your investment delivers outstanding results for years to come.