
A professional concert lighting system does far more than illuminate performers. It creates atmosphere, enhances audience engagement, supports the music, and transforms an ordinary stage into a memorable visual experience.
From small indoor venues to large-scale festivals and arena tours, lighting design plays a critical role in the success of every concert production. A well-designed system combines the right fixtures, control systems, positioning, and programming to deliver impactful and reliable performance.
In this guide, we’ll walk through the essential steps involved in designing a professional concert lighting system.
Why Concert Lighting Matters
Concert audiences expect more than great music.
Professional lighting helps:
- Create excitement
- Enhance visual impact
- Highlight performers
- Support stage effects
- Improve audience engagement
- Strengthen artist branding
Modern concerts often rely on lighting as much as sound to create immersive experiences.
Step 1: Understand the Venue
Every lighting design begins with venue analysis.
Important factors include:
Venue Size
A small club requires a different approach than a stadium or outdoor festival.
Stage Dimensions
Measure:
- Width
- Depth
- Height
These dimensions determine fixture placement and beam coverage.
Rigging Points
Identify available truss locations and load capacities.
Power Availability
Calculate available electrical capacity before selecting fixtures.
Audience Viewing Angles
Consider how lighting will appear from all seating positions.
Understanding venue limitations prevents costly design mistakes.
Step 2: Define Production Requirements
Different concert types require different lighting approaches.
Rock Concerts
Often use:
- Beam effects
- Fast movement
- Dynamic color changes
- High-energy programming
Worship Concerts
Typically focus on:
- Smooth transitions
- Atmospheric effects
- Audience engagement
EDM Events
Frequently utilize:
- Intense beam effects
- Lasers
- Strobes
- Synchronized visual sequences
Corporate Concerts
Require a balance between entertainment and professional presentation.
The lighting system should support the performance style.
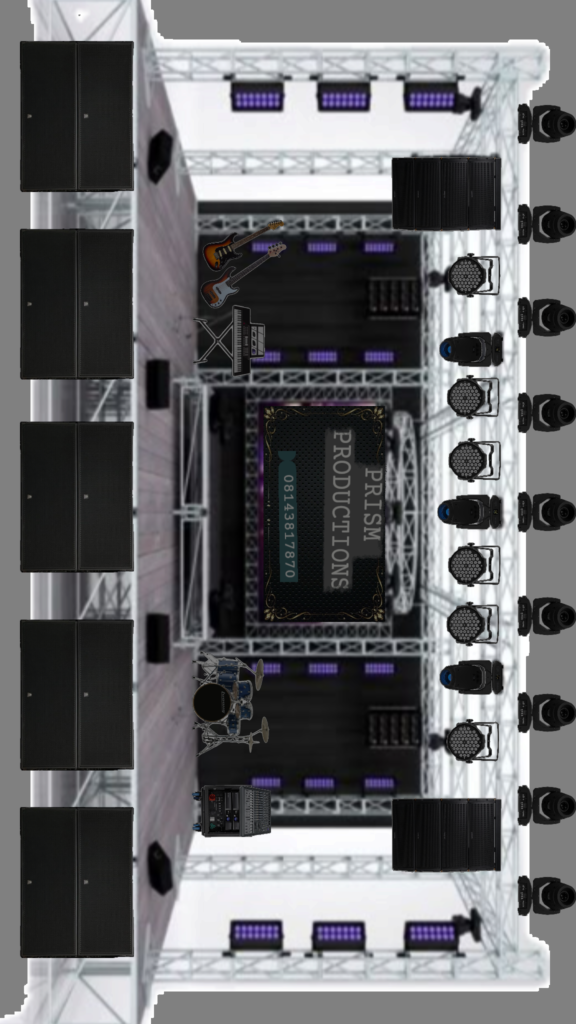
Step 3: Build the Fixture Package
The fixture package forms the foundation of the lighting system.
Moving Head Beam Lights
Beam fixtures produce narrow, high-intensity shafts of light.
Common uses:
- Aerial effects
- Audience sweeps
- Dynamic movement
Moving Head Spot Lights
Spot fixtures provide:
- Gobo projections
- Focused highlighting
- Pattern effects
Moving Head Wash Lights
Wash fixtures create:
- Stage coverage
- Color washes
- Ambient lighting
LED PAR Lights
PAR fixtures are commonly used for:
- Stage washes
- Performer illumination
- Truss lighting
Follow Spot Lights
Follow spots help operators track performers during live performances.
Strobe Lights
Used for:
- High-energy moments
- Dramatic visual effects
A balanced fixture package provides maximum creative flexibility.
Step 4: Design the Lighting Layout
Fixture placement is just as important as fixture selection.
Front Lighting
Provides visibility for performers.
Primary purpose:
- Facial illumination
- Audience visibility
Side Lighting
Enhances movement and stage depth.
Commonly used in:
- Dance performances
- Concert productions
Back Lighting
Creates separation between performers and backgrounds.
Benefits:
- Depth
- Dramatic effects
- Visual contrast
Overhead Lighting
Mounted on trusses above the stage.
Provides:
- Wash coverage
- Beam effects
- General illumination
Audience Lighting
Used to involve the audience in the performance.
Many modern concerts incorporate audience-facing fixtures.
Step 5: Incorporate Truss Systems
Professional lighting fixtures are usually mounted on truss structures.
Common configurations include:
Front Truss
Provides key lighting.
Mid Truss
Supports wash and spot fixtures.
Rear Truss
Often used for beam effects and backlighting.
Ground Support Truss
Ideal for venues with limited rigging options.
Proper truss design improves both safety and performance.
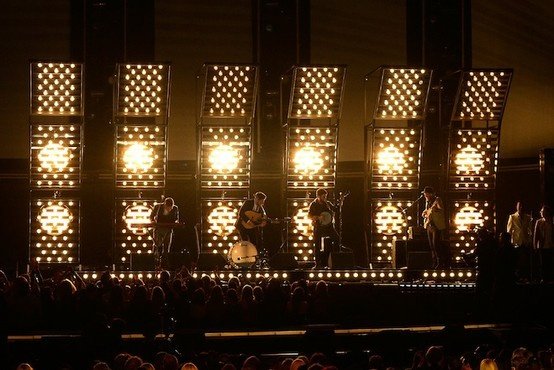
Step 6: Choose a Lighting Control System
Even the best fixtures require proper control.
Professional systems typically use:
DMX Lighting Consoles
Industry-standard control platform.
Lighting Software
Computer-based systems offer flexibility and advanced programming.
Wireless DMX
Useful for temporary installations and outdoor events.
Reliable control systems are essential for successful shows.
Step 7: Plan Power Distribution
Power planning is often overlooked but critical.
Consider:
- Total fixture wattage
- Circuit capacities
- Power distribution boxes
- Redundancy requirements
Proper planning prevents overloads and equipment failures.
Step 8: Create Lighting Zones
Professional designs often divide fixtures into functional groups.
Examples include:
Performer Lighting Zone
Provides visibility for artists.
Effects Zone
Controls beams, gobos, and dynamic effects.
Audience Zone
Engages spectators.
Background Zone
Enhances stage scenery and video elements.
Zoning simplifies programming and operation.
Step 9: Program Dynamic Lighting Scenes
Programming transforms fixtures into a complete visual system.
Typical scenes include:
Intro Scene
Builds anticipation before performers appear.
Verse Lighting
Supports lower-energy moments.
Chorus Lighting
Increases intensity and excitement.
Solo Highlights
Focuses attention on individual performers.
Finale Sequence
Creates a memorable ending.
Professional programming enhances audience experience throughout the performance.
Step 10: Integrate Special Effects
Modern concert productions frequently incorporate effects equipment.
Examples include:
- Fog machines
- Haze machines
- Strobes
- Lasers
- CO₂ effects
- Spark machines
Effects can dramatically increase visual impact when used correctly.
Step 11: Prioritize Reliability and Redundancy
Live productions leave little room for failure.
Professional systems often include:
- Backup consoles
- Spare fixtures
- Redundant power systems
- Additional DMX lines
Redundancy minimizes risks during critical performances.
Common Concert Lighting Design Mistakes
Too Few Fixtures
Insufficient fixture quantity limits creative possibilities.
Poor Fixture Placement
Even high-end fixtures perform poorly when positioned incorrectly.
Inadequate Power Planning
Can lead to outages and equipment damage.
Ignoring Audience Sightlines
Lighting should look impressive from every viewing angle.
Overusing Effects
Excessive movement and strobes can reduce overall impact.
Balance is key.
Example Concert Lighting Setup
A medium-sized concert production may include:
- 12 Moving Head Beam Lights
- 8 Moving Head Spot Lights
- 8 Moving Head Wash Lights
- 16 LED PAR Lights
- 2 Follow Spots
- 4 Strobe Lights
- DMX Lighting Console
- Truss System
- Power Distribution Equipment
This setup provides excellent versatility for most live music events.
Frequently Asked Questions
What lights are most commonly used in concerts?
Moving head beam, spot, wash, LED PAR, and follow spot lights are among the most common concert fixtures.
How many lights does a concert stage need?
The number depends on venue size, production requirements, and budget.
Why are moving head lights popular in concerts?
They provide automated movement, color changes, beam effects, and flexible programming options.
What control system is used for concert lighting?
Most professional concert lighting systems use DMX512-based control systems.
Do concerts use LED lighting?
Yes. LED technology dominates modern concert lighting because of its efficiency, flexibility, and long lifespan.
Conclusion
Designing a professional concert lighting system requires careful planning, fixture selection, layout design, power management, and programming expertise. A successful system balances creativity, technical performance, and reliability to deliver memorable experiences for audiences and performers alike.
Whether you’re designing lighting for a local venue, touring production, music festival, or arena show, understanding these principles will help you build a system capable of producing professional-quality results.